Web application styling using UIkit
This post is part of the series “How to build your own Network Configuration Generator”. You find the overview about the entire series here. The last state of the code is available at the Network Configuration Generator GitHub repository.
I like to show you today, how I update the style of the Network Configuration Generator using the UIkit CSS framework. As mentioned in my last post, the (most) functional requirements are already satisfied, but plain HTML is not the best look and feel for a Web service.
Today, I pushed an update to the Network Configuration Generator Github repository with the styled version of the Web service.
HTML and CSS frameworks
HTML is the basic element of any webpage and there are tons of tutorials out there, how to create your own webpage. If you start learning HTML, you will fast recognize that it is not very complicated at all. If you like to learn more about HTML (and other web technologies), take a look at the codeacademy HTML & CSS course.
Plain HTML is just the skeleton of a webpage, the style is defined in most cases using Cascading Stylesheets (CSS). Because of the many versions of devices and browsers, I prefer the use of a pre-build CSS framework. You can code your own style using CSS, but from my point of view, the time investment is to large to meet all the needs. Furthermore, the entry barrier is usually quite low, as far as you have a fundamental understanding of CSS.
One popular CSS frameworks is Twitter Bootstrap. You find it on many websites and even on a Cisco Nexus 5000 switch (the Cisco NX-API sandbox is styled using Bootstrap). I’ve used this framework a lot in the past, but as mentioned at the beginning of this series, I want to try something new…
The Network Configuration Generator is styled using the UIkit CSS framework. It is a lightweight and modular font-end framework, that includes CSS and Javascript/JQuery components, e.g. to display notifications on the webpage. You can easily learn how to use the framework with the UIkit Video Tutorial. You need some basic understanding of HTML, CSS and Javascript/JQuery prior starting with the Video tutorial.
An entire crash course of HTML, CSS and Javascript/JQuery is too much content for a single post, therefore I’ll like to show you some “before” and “after” screenshots of the Network Configuration Generator. If you like to dive deeper into the changes, just have a look to the “styling commit” for the HTML templates in the Github repository.
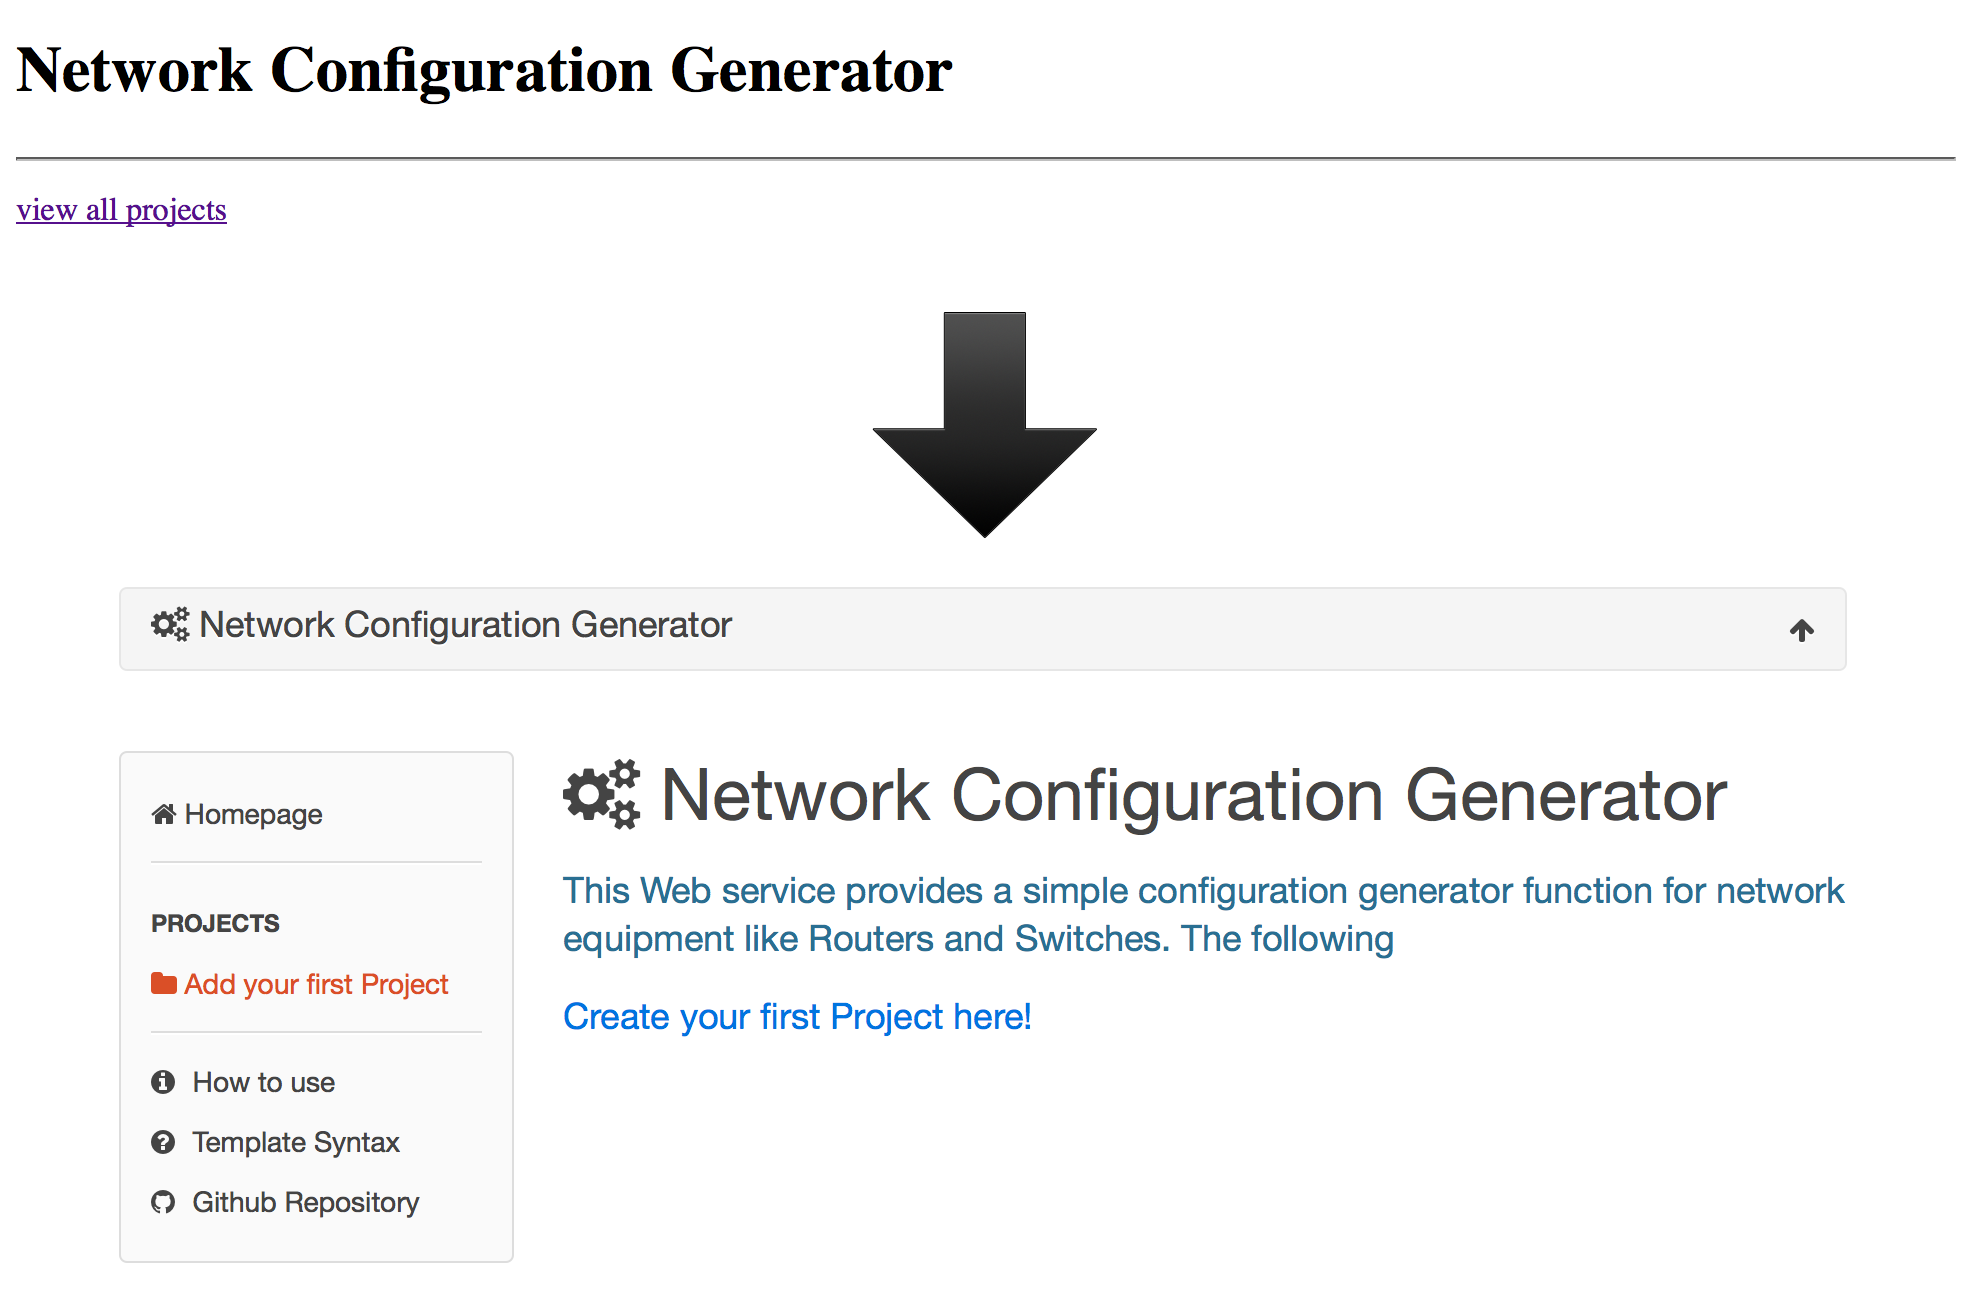
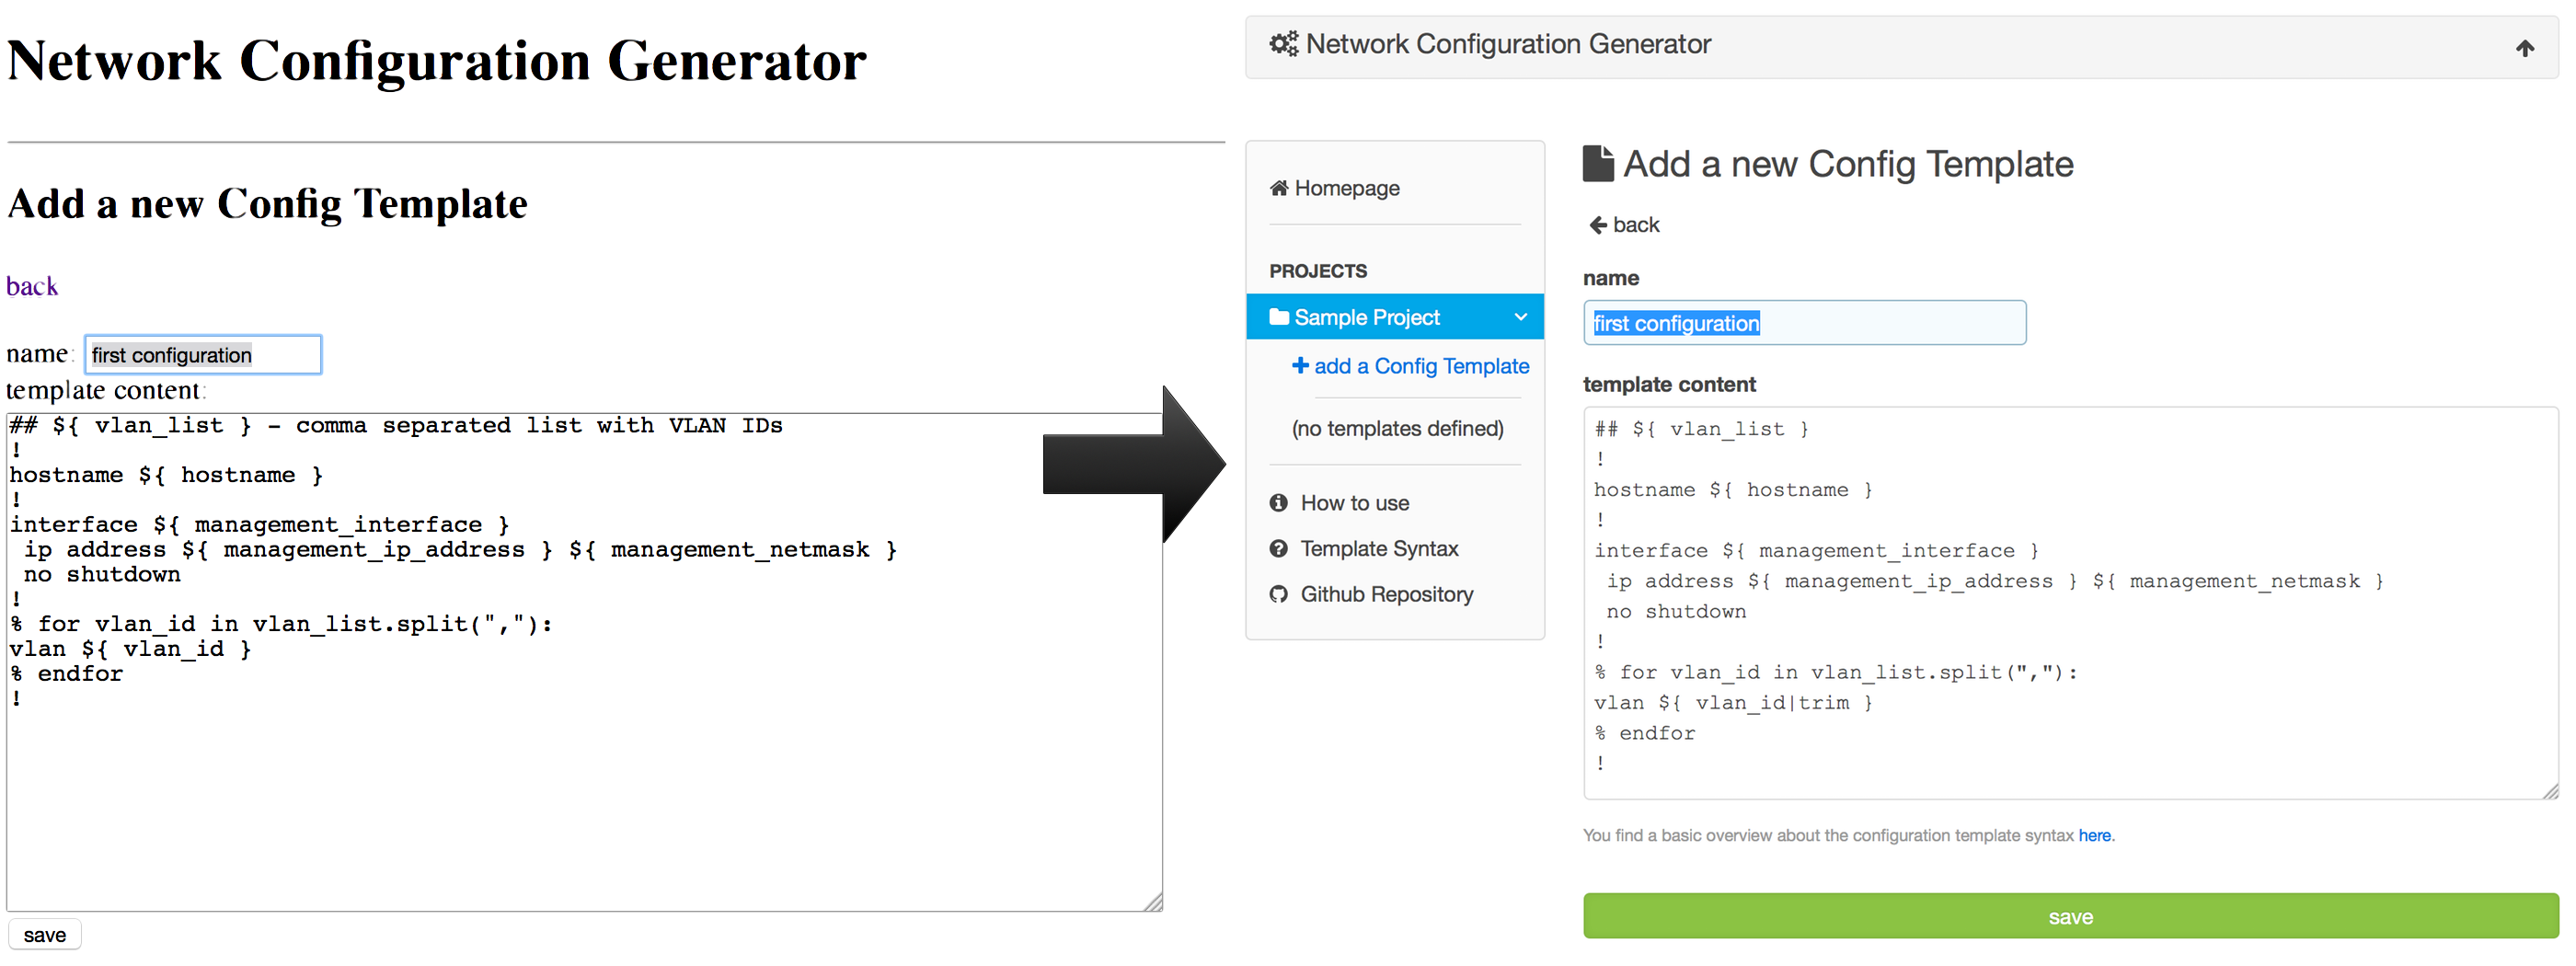
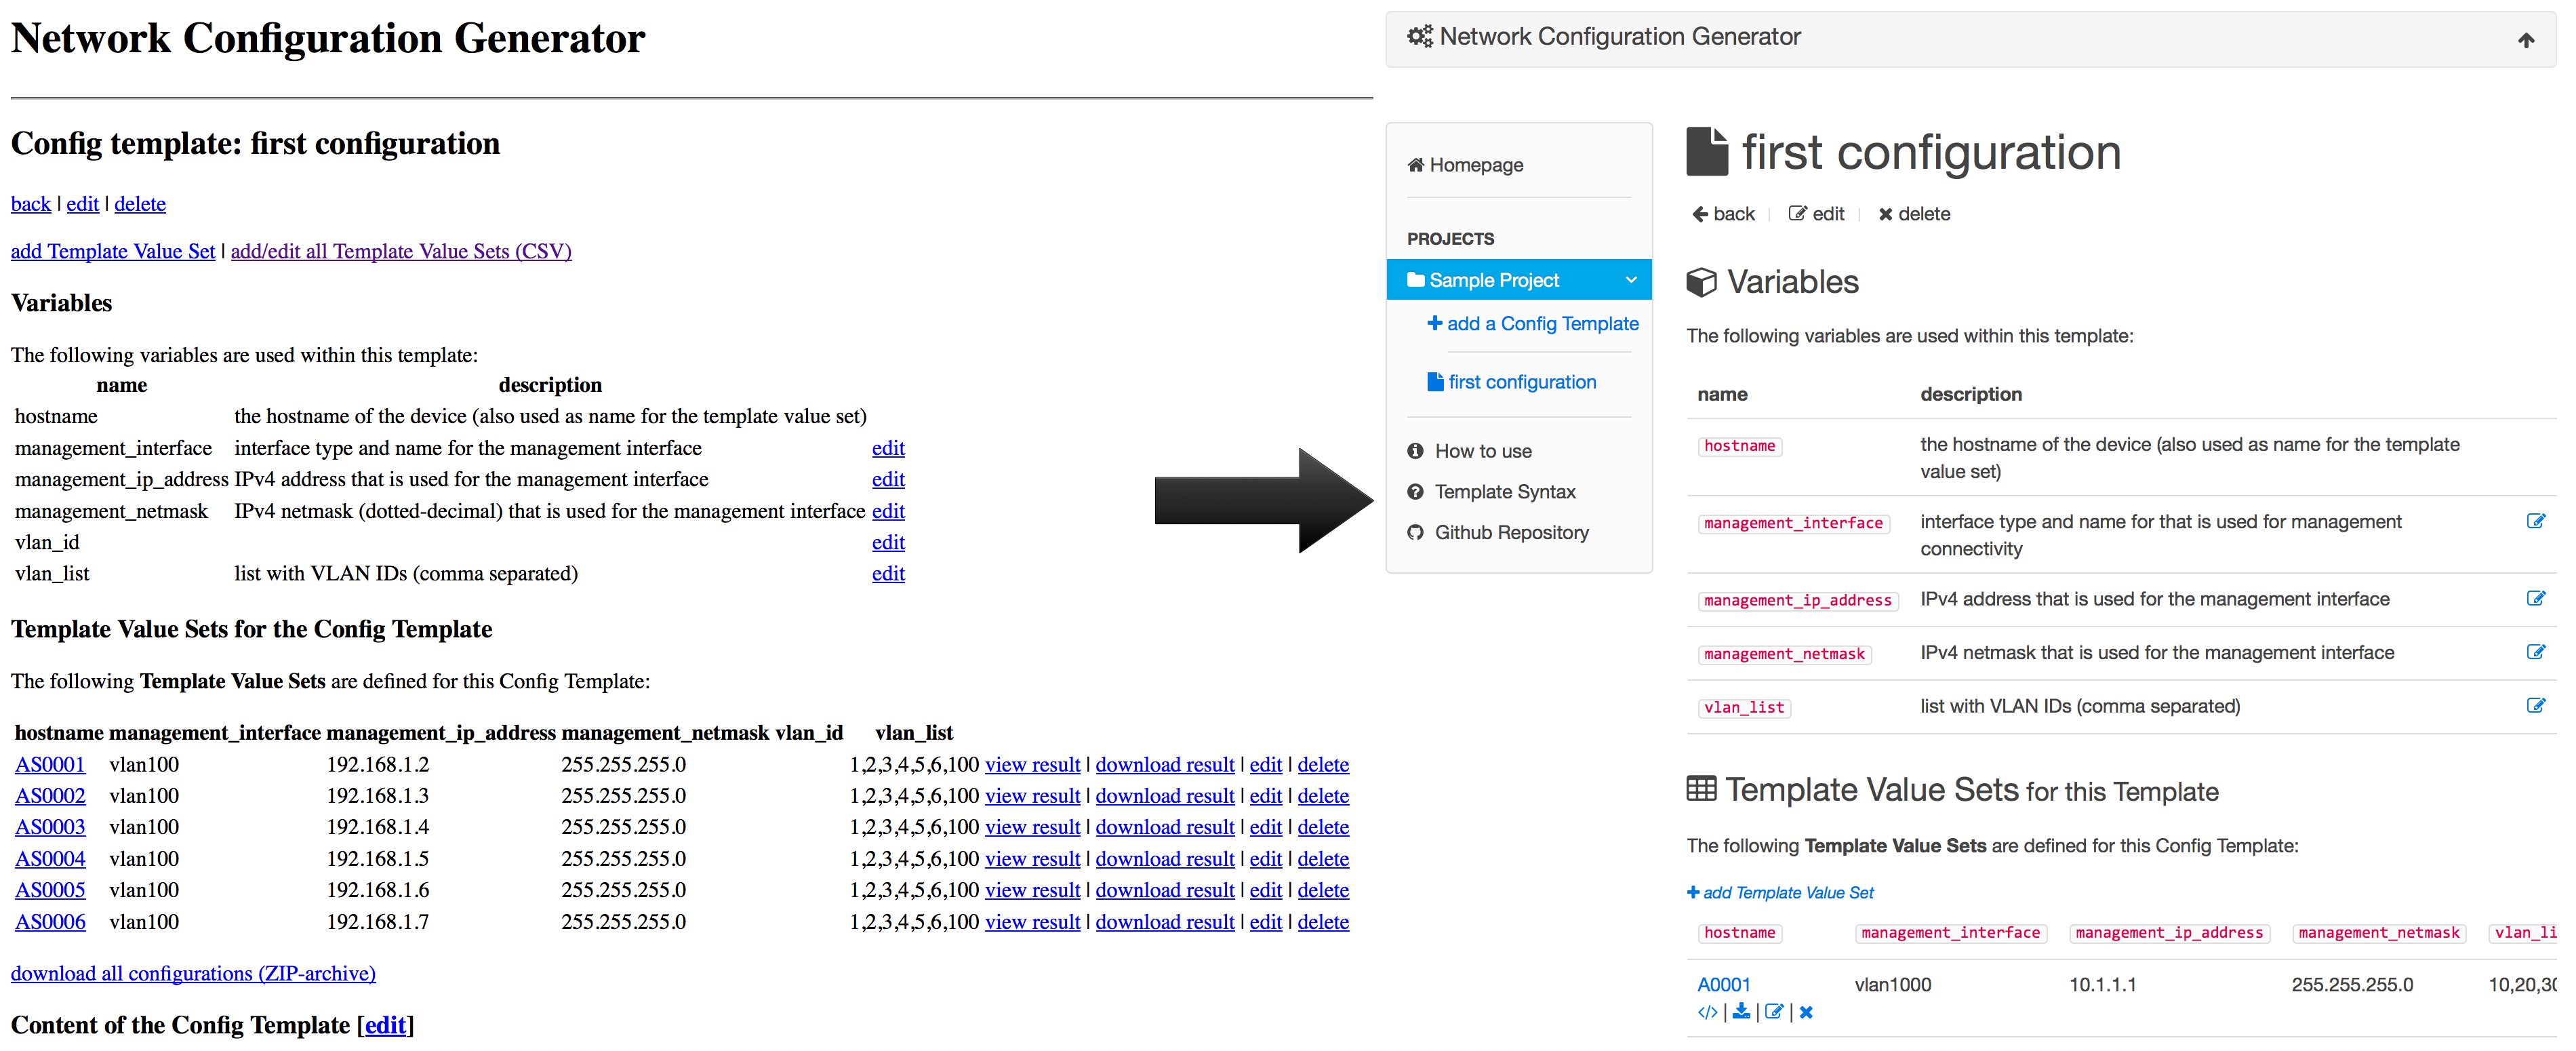
Network Configuration Generator – before and after
The major change was the addition of some basic navigation elements (and site layout at all), as you can see in the following screenshot of the homepage.
The UIkit integrates without many modifications in the standard HTML tags. At some point, you just need to add a class statement to the top container element (e.g. the table or form tag) and it totally changes the look and feel as you can see on the next screenshots.
What’s next?
The next post should discuss the deployment options for the Web service. Within the Flask overview post, I already provided an “easy” five-step deployment process to get the application running on an Ubuntu machine. This is not as comfortable as I expect, but we will see how it is solved in the next post.
That’s it for today, thanks for reading.