Use Vagrant to run the Python examples
I will show you this week how to use Vagrant to run the python scripts from my examples repository without any changes on your working environment. The only thing that you need are two tools: VirtualBox and Vagrant. I think that VirtualBox is quite common today to host VMs on your laptop. Vagrant is primarily a tool to create and provision these machines based on a single configuration file. It is very useful if you need to share it e.g. for development purpose.
I committed the required files to work with Vagrant yesterday to my python example repository on GitHub. I will use these for the further explanation in this post. This repository contains also the code from my last two practical posts about Parsing CLI output with TextFSM and the Configuration generator with python and Jinja2.
Before we start with the example, lets have a closer look at Vagrant.
What is Vagrant and why use it?
Vagrant is a great tool that allows you to create an isolated test and development environment using virtual machines. It runs on Windows, Linux and Mac OS X and uses various virtualization and cloud environments. The intended use case is for developers, who need to create and share an isolated reproducible testing environment for there application.
I first discovered Vagrant when I need to deploy a Django application with some backend functionalities (task scheduler). The test on my local machines doesn’t work well, because there were so many things to consider before the application was running. I don’t want to talk about the deployment on another machine… Vagrant eliminates all these problems for me.
Vagrant is a free tool from Hashicorp that you can use to automatically create a virtual machine (or an entire virtual environment) on you laptop and/or external systems. The specification of the machine is expressed in a single configuration file, which contains the following main parts:
- Definition of the base box (for me it was primary the operating system but there are also application stacks available)
- Synced folders
- Networking
- Provisioning (shell scripts, Ansible playbook’s and many many more)
You can do a lot with this tool, but I will keep it simple for this post and show you how to create a Ubuntu Linux machine on your laptop. During the setup, Vagrant will also install all dependencies that are required to run the examples from the python example posts.
Installing Vagrant and download the repository
Installing Vagrant is quite easy. You can download the software for free at the Vagrant homepage. To get it working on your local system, you need a provisioner. We will use VirtualBox within this example, but you can also choose another one like VMware Fusion etc. The full list of supported provisioners is available at the Vagrant documentation.
After you completed the installation on your system, clone my python script examples repository. You might note that there are three new files in it:
requirements.txt– which is just added to document the required packages for pythonsetup.yaml– which is an Ansible playbook to install and configure the machineVagrantfile– which contains the description of the VM that we will create
The setup.yaml file is an Ansible playbook, which is used to configure the virtual machine (install packages, clone dependencies etc.). At time of this writing, Ansible is not supported on Windows. To get the virtual machine also working on Windows, I will not use the integrated Ansible provisioner of Vagrant. Instead, the Vagrant file contains a shell provisioner, which will install Ansible on the VM and runs the playbook locally. I know that sounds a bit weird and complicated, but I found no other (easy) way to get it working on Windows and you maybe won’t notice it.
The following statement within the Vagrant file will trigger the installation of Ansible and the local execution of the playbook:
config.vm.provision "shell",
    inline: "sudo apt-get install ansible -y && ansible-playbook -i 'localhost,' -c local /vagrant/setup.yaml",
    keep_color: true
I will explain Ansible in more detail in another post. Today, I just add a link to the Ansible documentation for further reading.
Start the environment
As mentioned in the introduction, running Vagrant is quite easy. Just open a terminal window, navigate into the directory of the python script example repository that you have cloned and execute the following command:
$ vagrant upVagrant will create the VM for you based on a public available Ubuntu 14.04 (trusty) box, which is downloaded from Hashicorp Atlas, which is a central repository for Vagrant boxes. You will see a lot of output during the start of the machine, similar to the following:
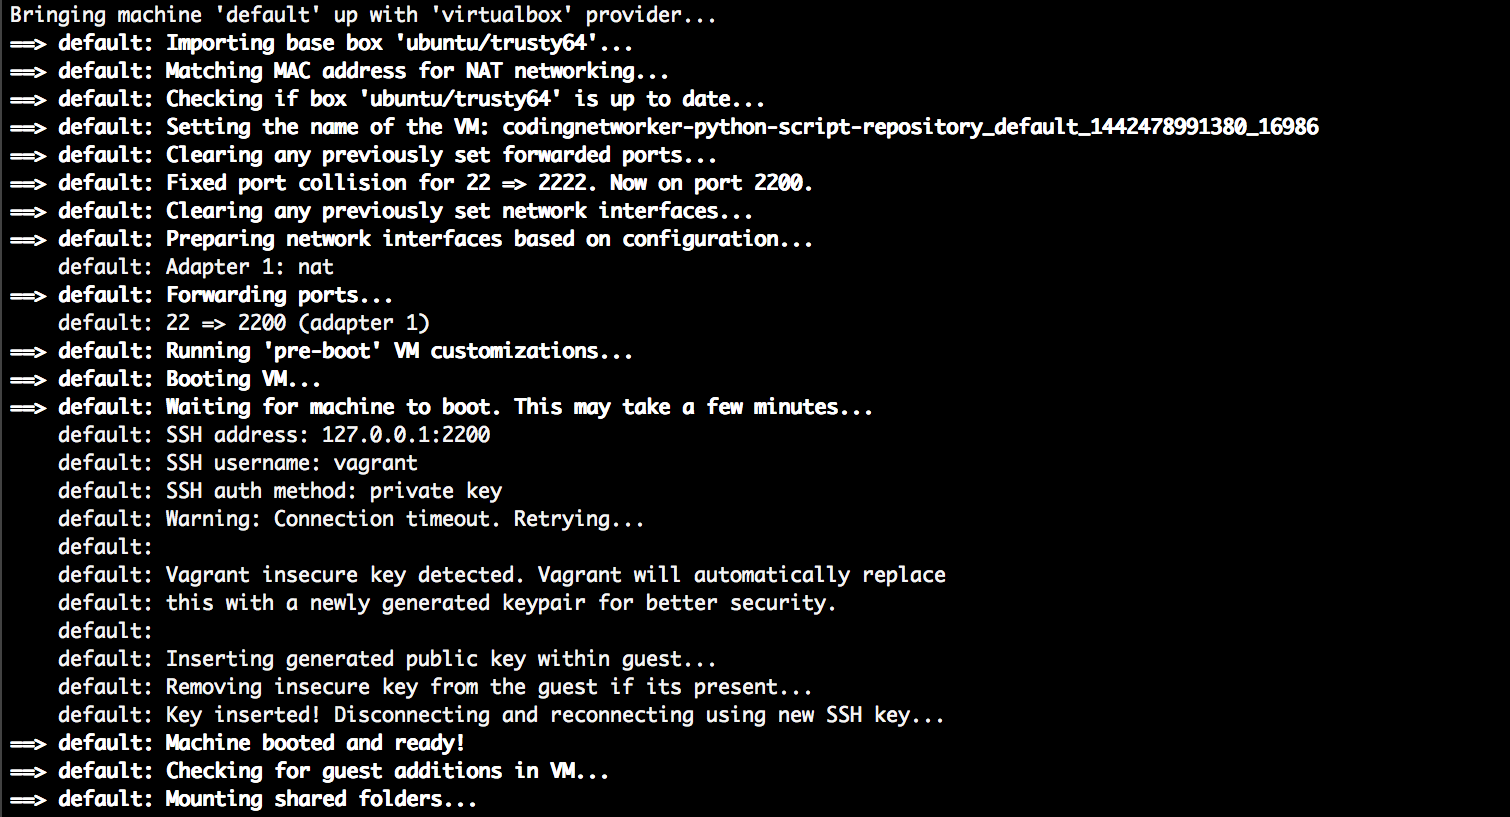
After the download, Vagrant will trigger VirtualBox to start the machine and will configure the SSH access to it using public key authentication. After the machine is ready to use, Vagrant will trigger the provisioner that is defined in the Vagrant file.
As mentioned earlier, here is the a little hack for the Windows users. We will trigger an inline shell script within the Vagrant file to install Ansible in the VM and then executes the setup.yaml playbook locally. The output of these task look similar to the following picture:
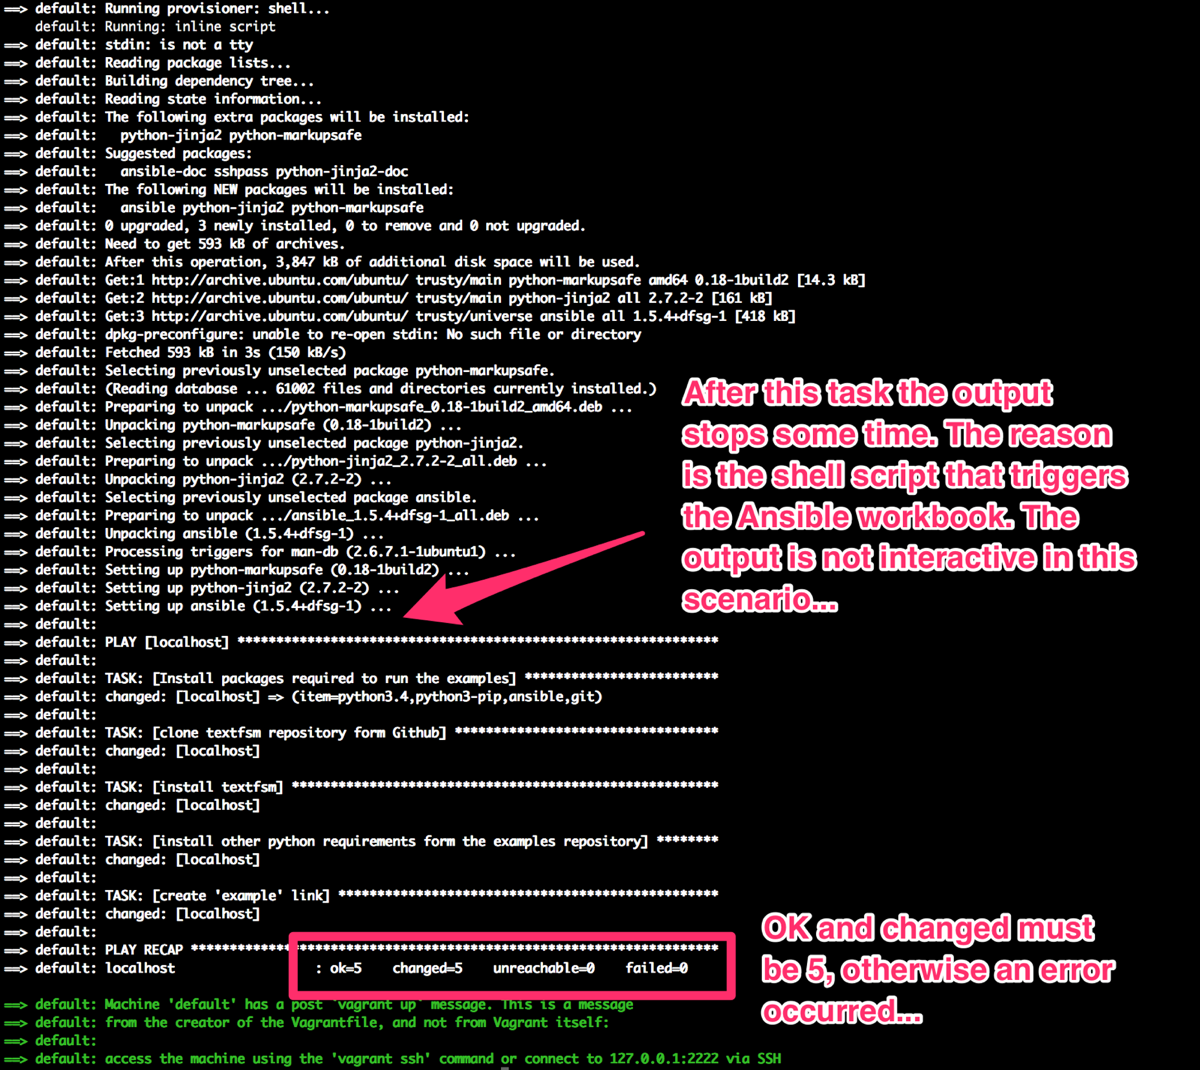
After this process has successful completed (you see it on the OK and changed state as described in the screenshot), you can use SSH to access the machine using the host 127.0.0.1, Port 2222 or simply type the following command on your Terminal:
$ vagrant sshQuick note for Windows users: I ran into an issue with this command, because Windows doesn’t include a SSH terminal program by default. For me it worked with putty with the following connection parameters:
Protocol: SSH
Hostname: 127.0.0.1
Port 2222
If the public-key authentication fails, you can also use the username/password combination vagrant/vagrant. As an alternative, you can install Git on your Windows machine and add the bin-directory to your environment variables. Vagrant will then use the ssh client that is bundled with git.
If you are now connected to the VM, you can see that this is a regular Ubuntu 14.04 LTS machine.
Running the python script examples
The Ansible playbook will install any dependencies that are required to execute the examples on the VM. Furthermore, it will create a link in the home directory named “examples” to simplify the navigation to the shared folder with the scripts. By default, Vagrant will configure a share with the VM for the folder that contains the Vagrantfile. It is normally mounted at /vagrant/. That allows you to modify the code or other files locally on your OS and execute it within the VM.
To try it out, use the following commands when you are connected to the Vagrant VM:
$ cd examples
$ cd config-generator-with-python-and-jinja2
$ python3 csv_based_config_generator.py
$ python3 json_based_config_generator.py
These scripts will create the templates in the _output directory, as described in the post Configuration generator with python and Jinja2. These files are immediately shared with your laptop.
After you played with the examples, you can stop the VM by using the command vagrant halt. This will trigger your provider to teardown the created VM. If you don’t need the machine anymore, just use the command vagrant destroy. This command will remove all files associated with the virtual machine.
Conclusion
You can do a lot more with Vagrant as I do in this post. I think the creation of Linux VM and the execution of some python scripts is a good starting point to get in touch with Vagrant.
I will continue to provide my python examples in this repository and now there is an easy way for you to try it out. That’s it for this week, now it is up to you. If you have any question and/or comments, I like to hear these in the comments section below. Thanks for reading.