Getting Started: Cisco Modeling Labs

I recently bought a Cisco Modeling Labs (CML) 2.2 personal license, get back to work on Network Automation and to prepare for my upcoming DevNet certification. Because I won’t depend on the access to a physical lab and I had some struggle with EVE-NG in the past, I decided to give Cisco Modeling Labs (CML) personal a try. Today, I’ll like to write about my first impressions and experiences with CML, including a first step to automate the lab setup using the API.
Setup and Installation
CML can be hosted as a virtual machine or bare-metal installation. I decided to use the VM on my AMD Ryzen PC together with VMware Workstation 16 Player. According to the CML System Requirements, a Server with an Intel Processor is recommended, but the CML application and most of the system-images are also working with AMD Processors.
After the download of the controller OVA and the refplat ISO, which includes the reference platforms for CML, the setup process is straightforward. First, you need to import the OVA and update the following configuration options:
- insert the refplat ISO to the CD drive
- increase the CPU and memory for the VM (depends on the number of devices that you want to deploy)
- on the CPU settings, make sure that the hardware-assisted virtualization (Intel VT-x/EPT or AMD-V/RVI) is enabled
If you use another virtualization product, some additional config options are required, for example on the network adapter. For details in this case, please have a look at the section prepare for Installation section in the CML Installation Guide.
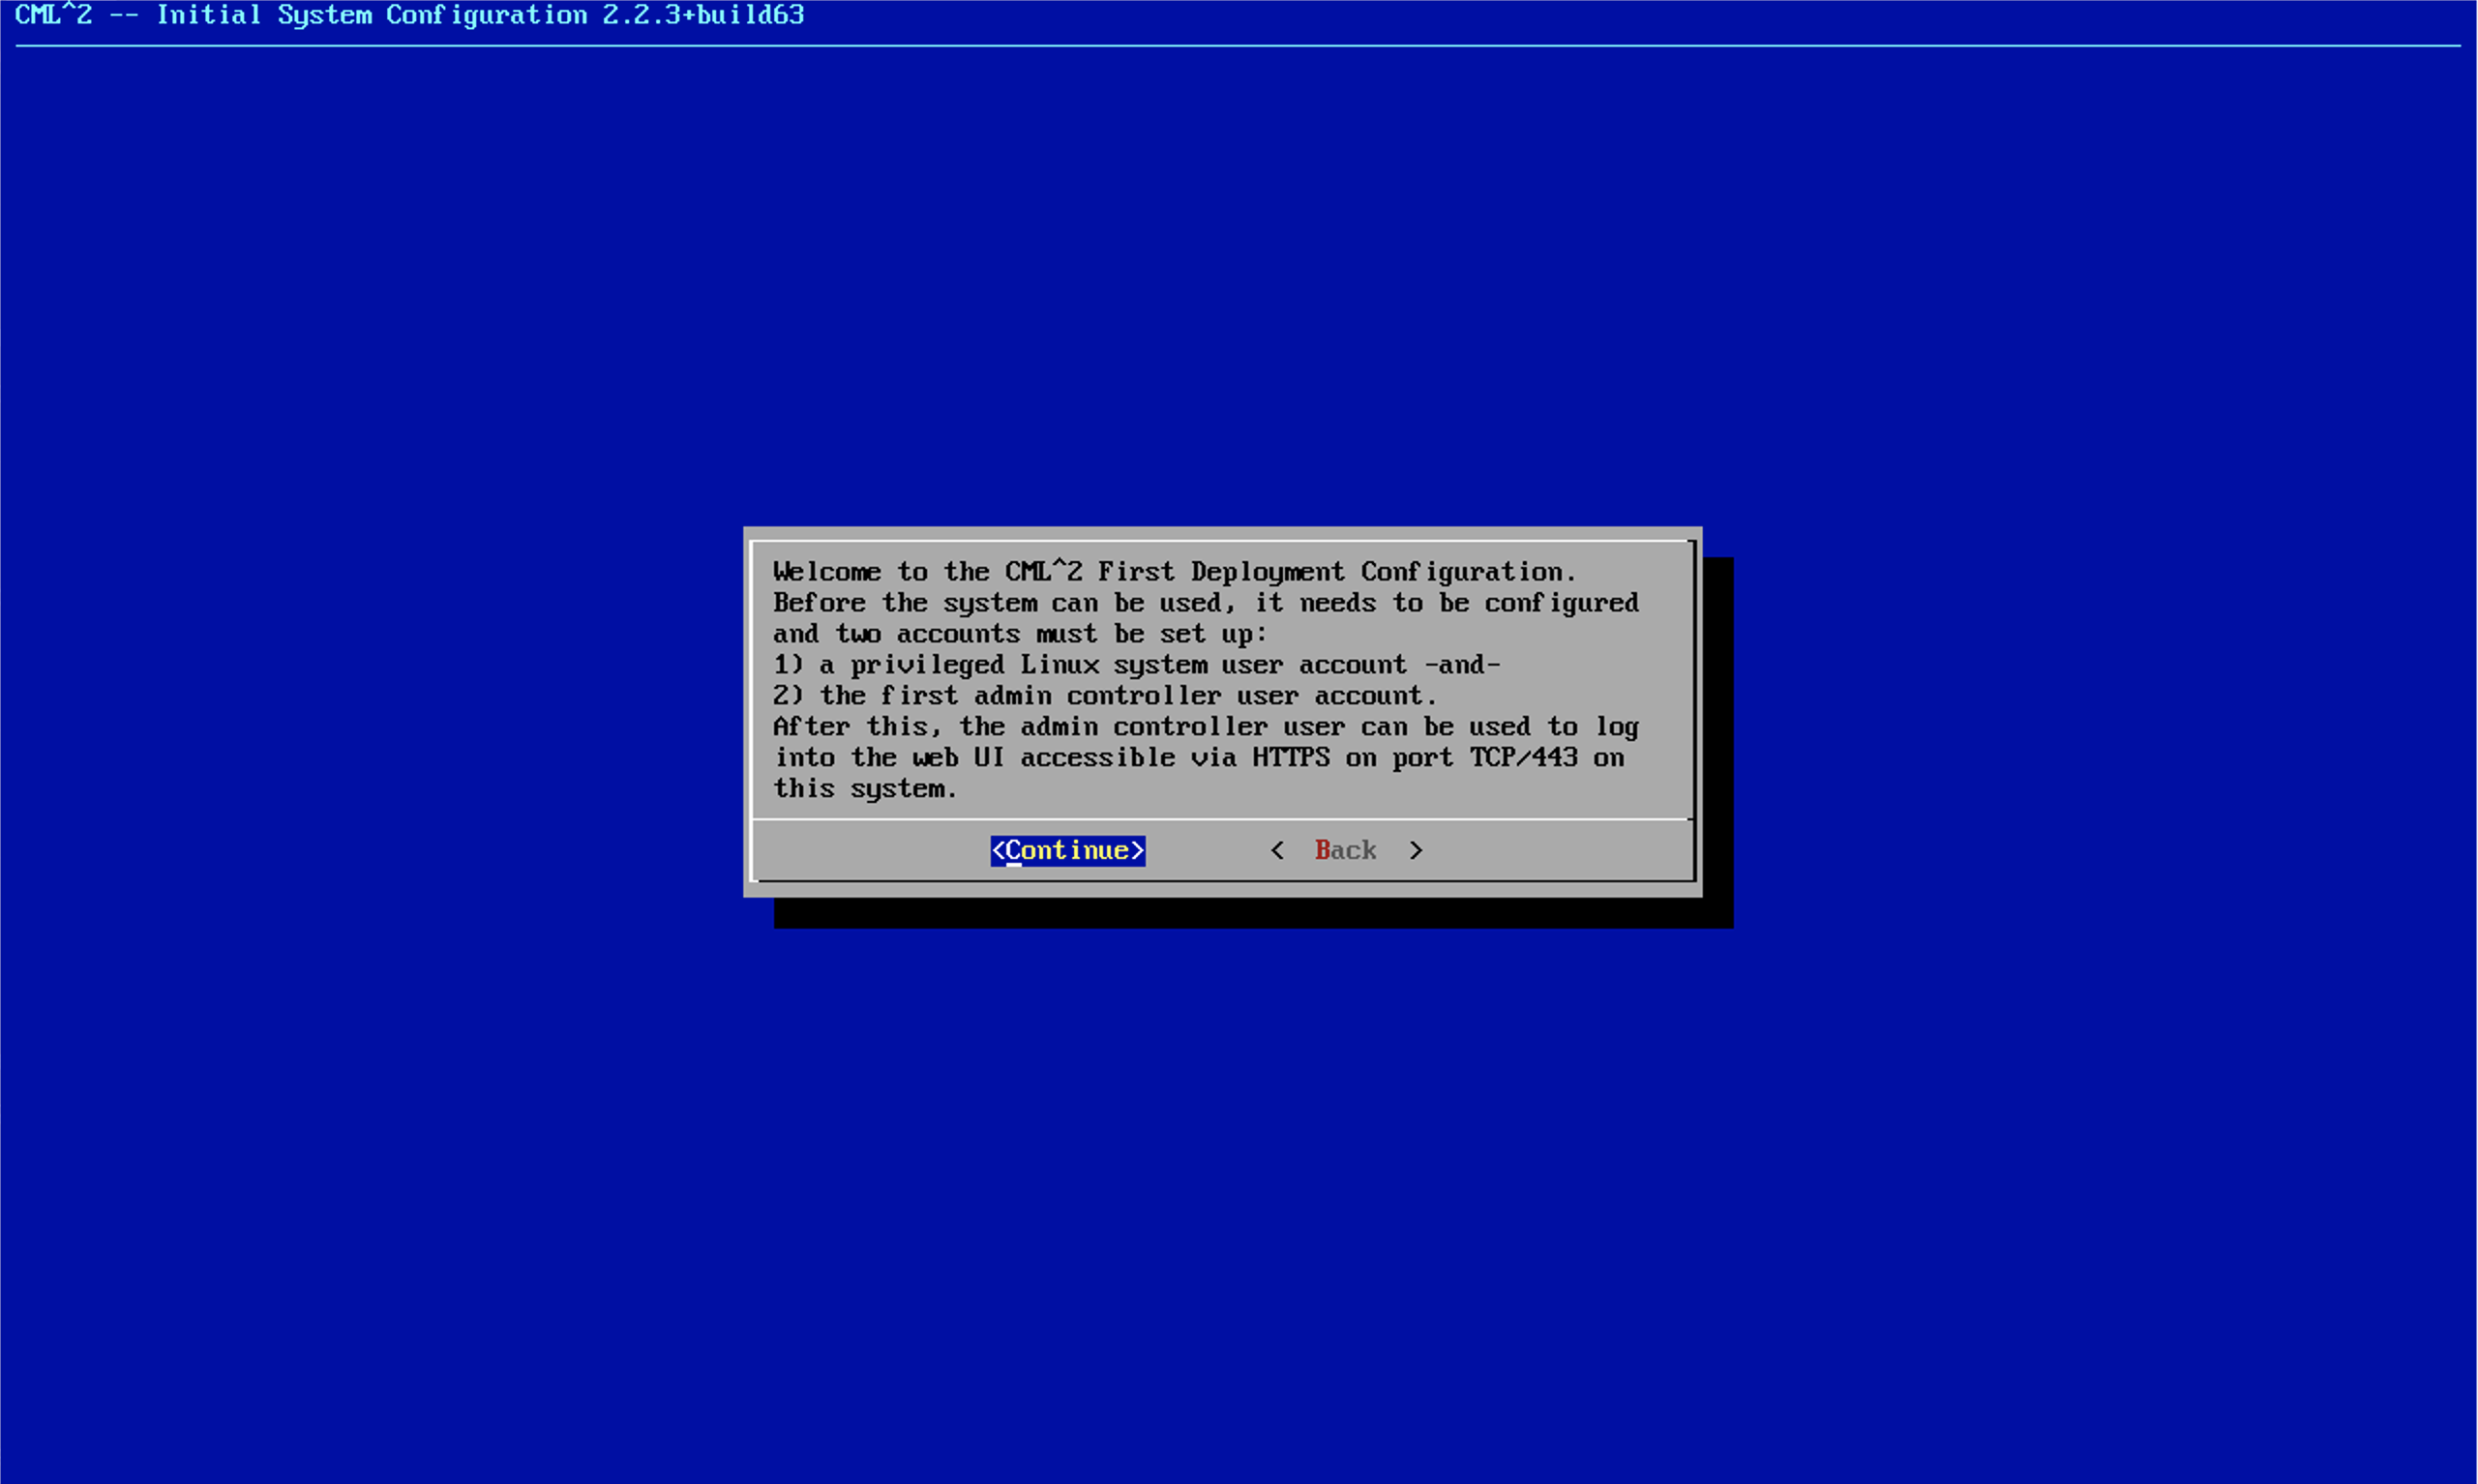
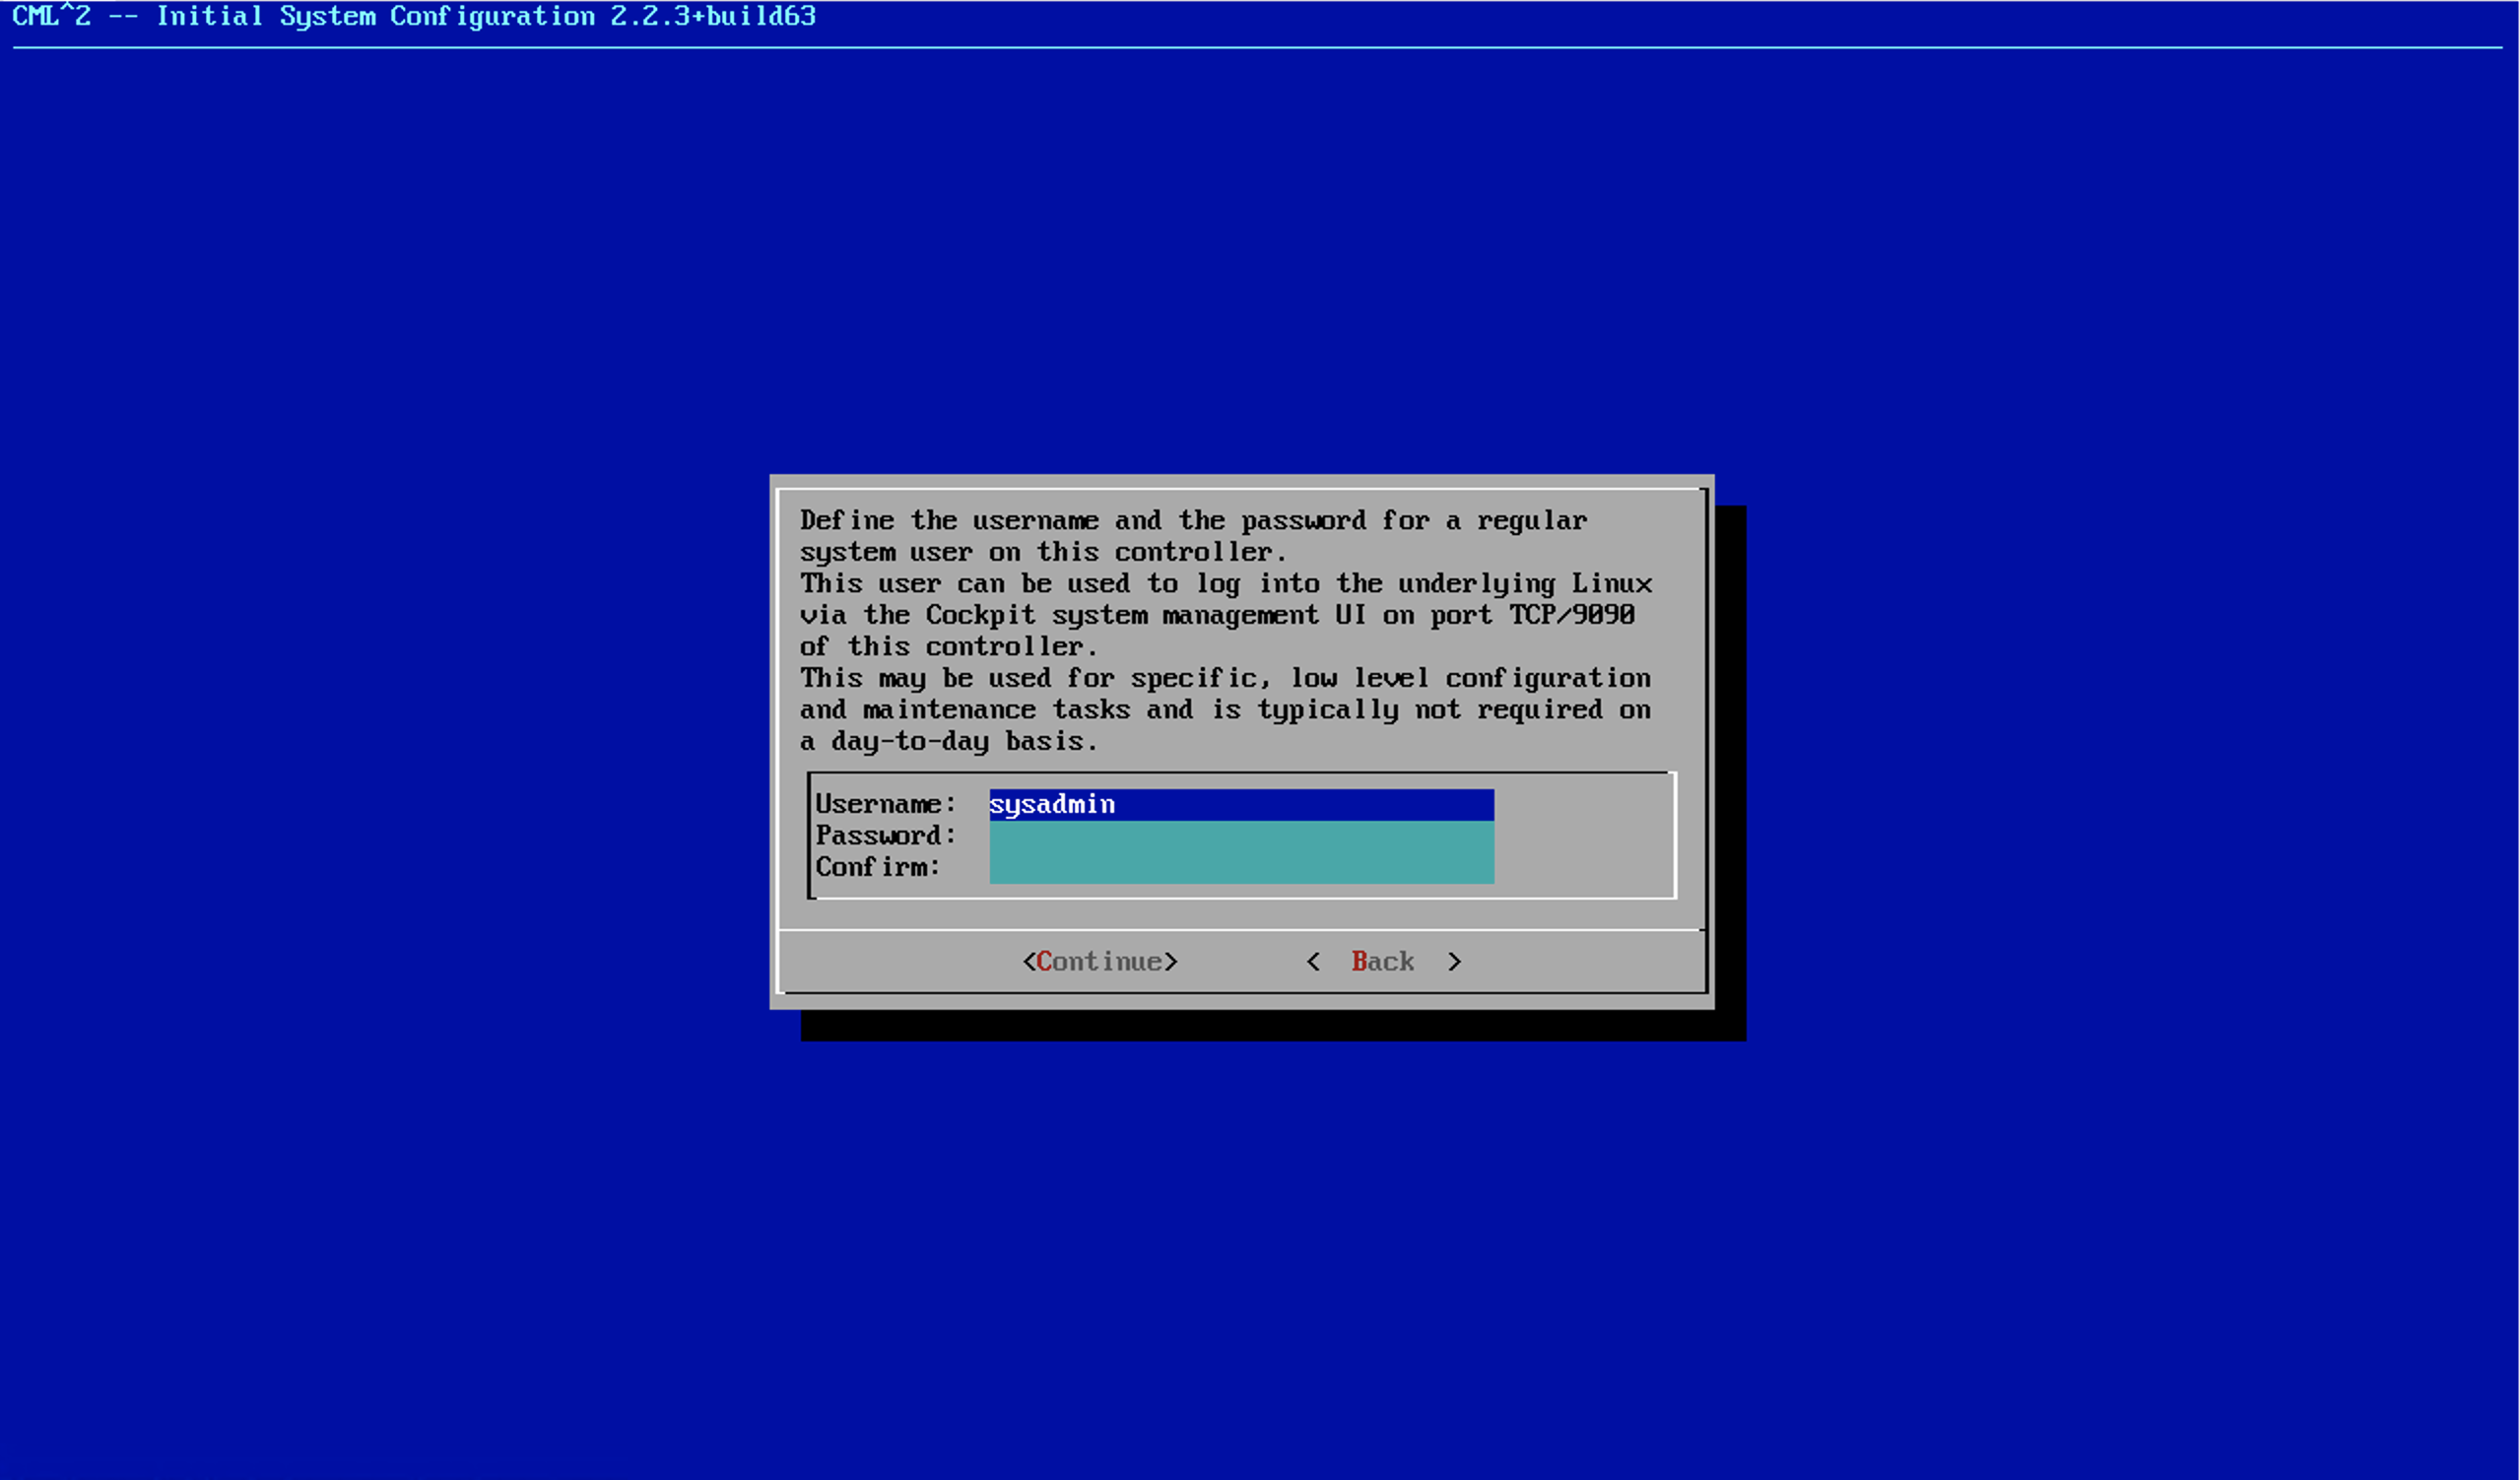
The following screenshots show the initial configuration dialog. It’s just used to create a privileged Linux user and the first admin account for the CML web-interface.
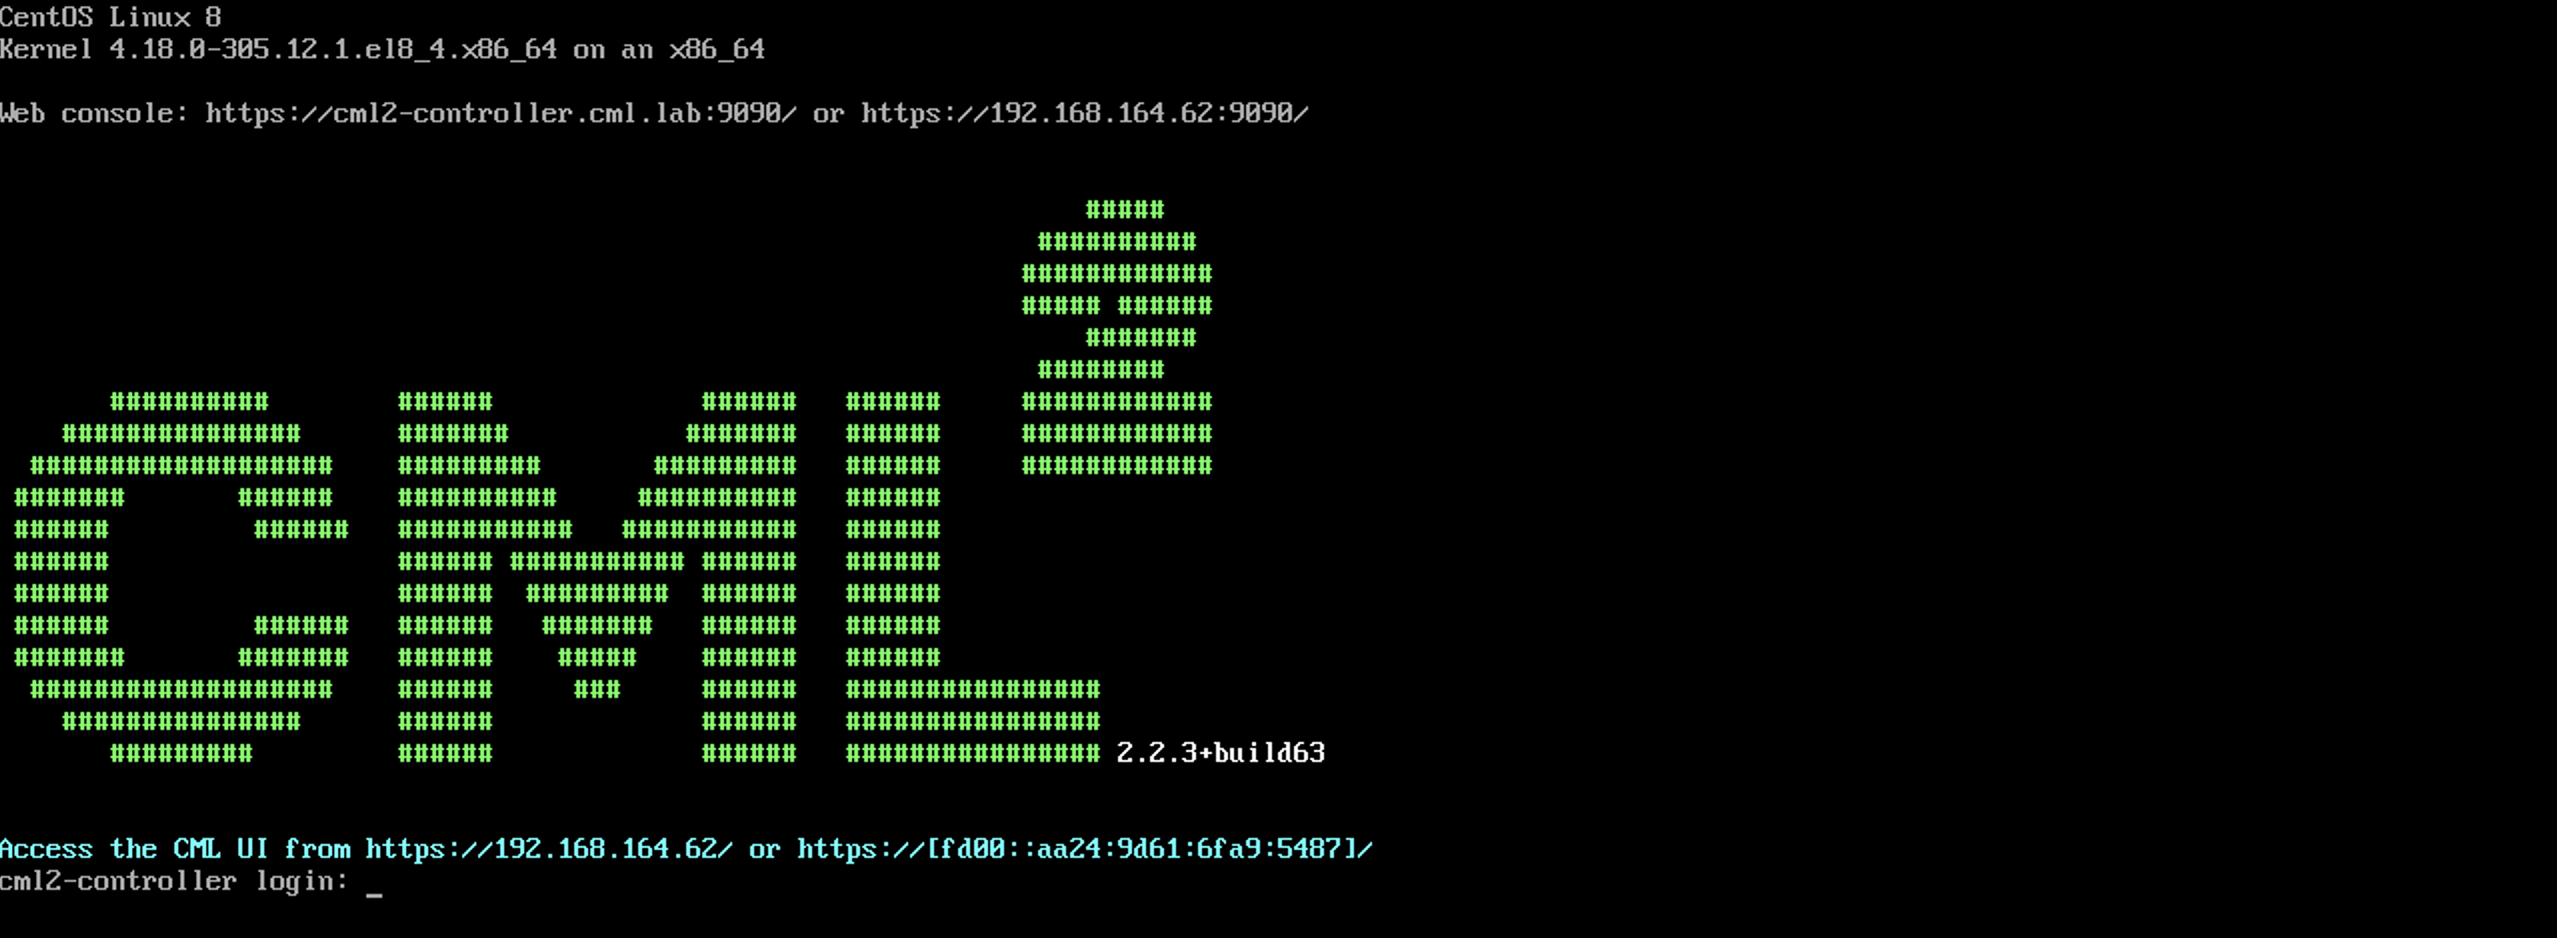
After a reboot, CML personal is already up and running. It’s configured to use DHCP by default and the URL is shown as part of the banner message as visible in the following screenshot.
Now you just need to log in on the web-interface with the initial admin user and add your license to the instance. This option is available from the top-right navigation menu at Tools > Licensing. Then you just need to press the Register button and provide the license details in the following dialog.

After some time, the state of the license should change to “Authorized” as shown in the following screenshot.
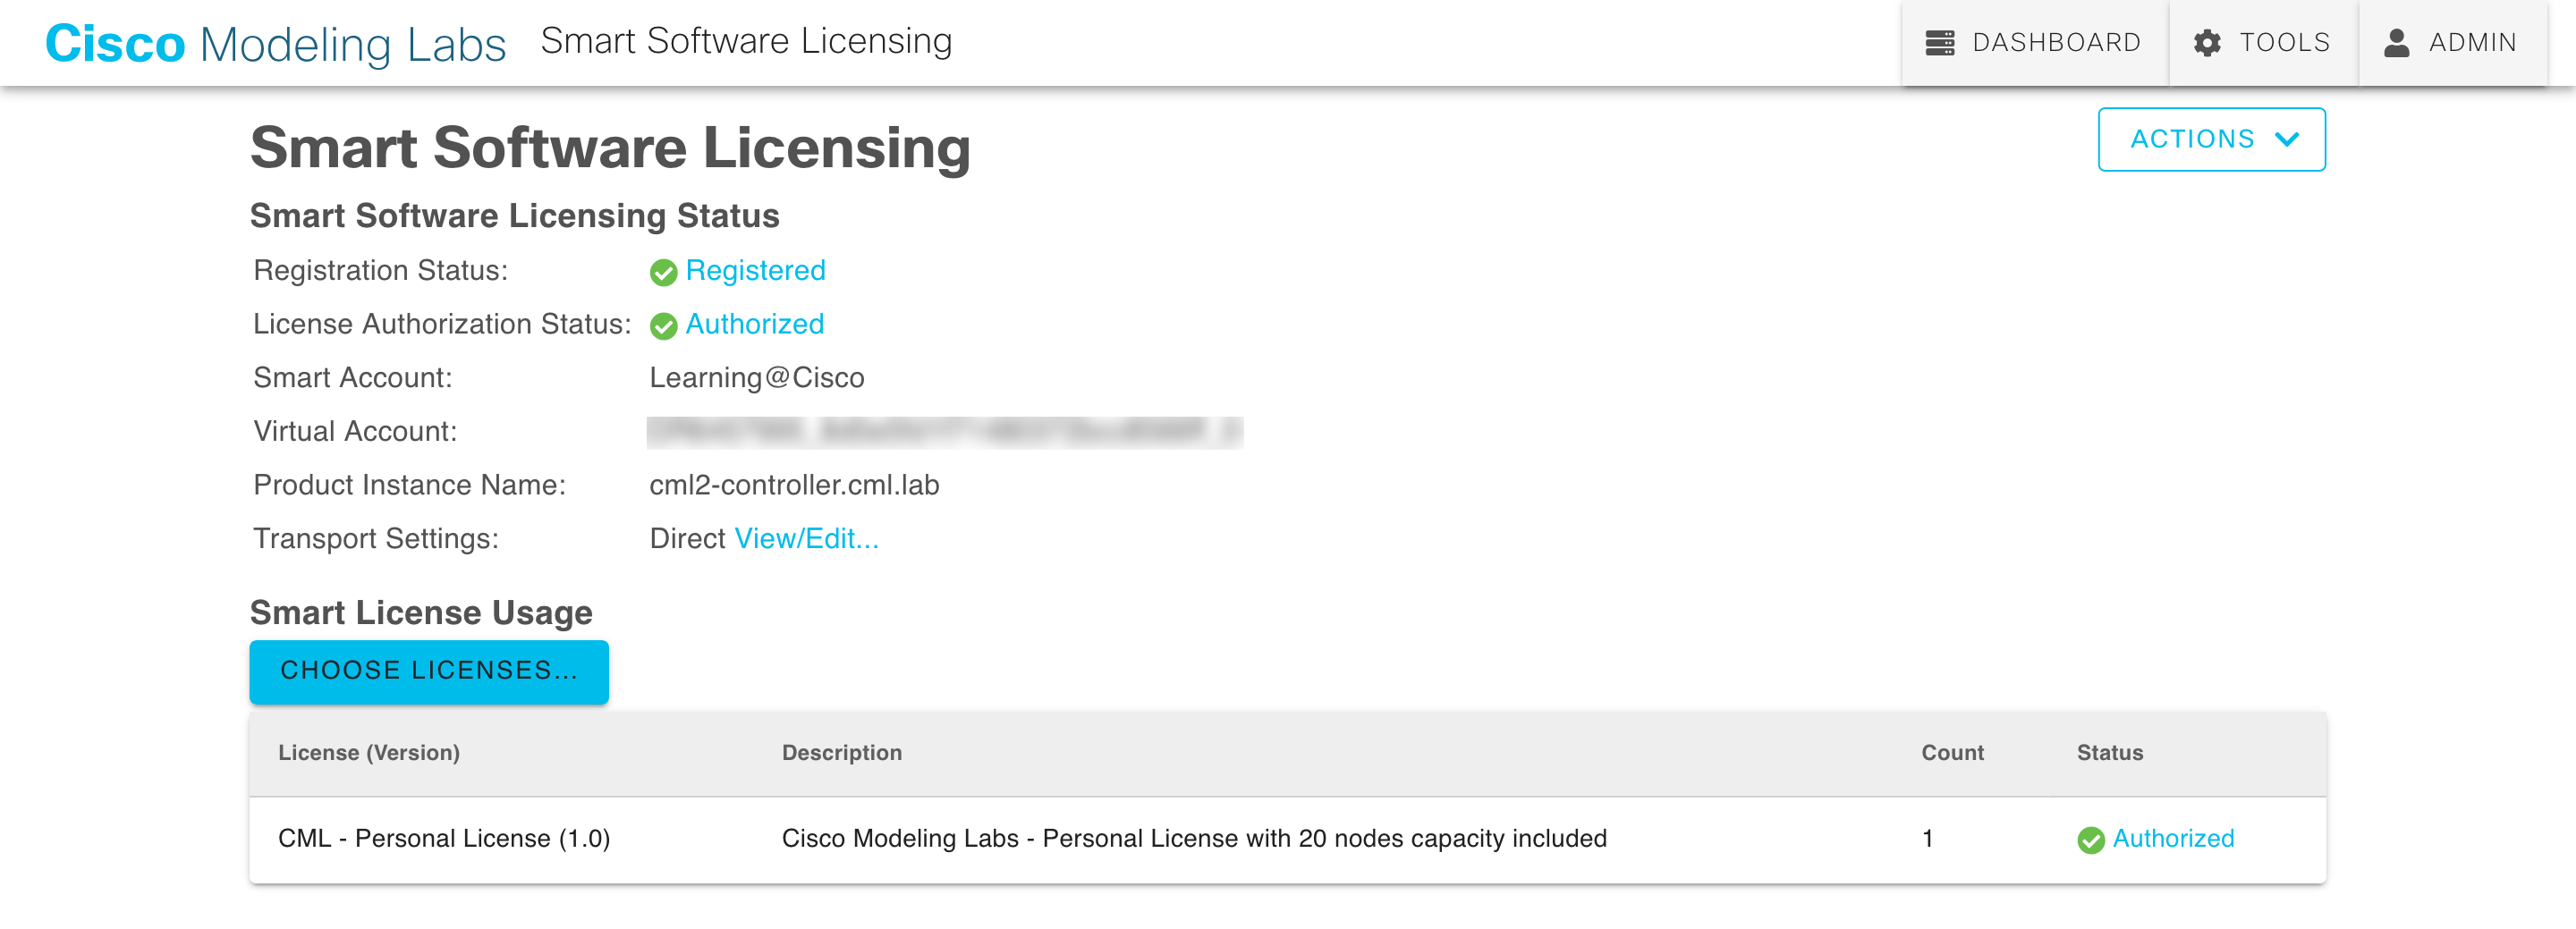
The license is now associated to the VM that you use. If you need to change the VM, you need to deregister the license from the current VM before creating a new one.
CML personal is now up and running.
Add Custom Nodes to CML Personal
Before we start using CML, let’s add one image that is currently missing in the reference platforms: the Catalyst 9800-CL Wireless Controller.
To add new devices to CML, we need to create a node and image definition. The image definition is the package from CCO that contains the Software for – in this case – the Catalyst 9800-CL. You get these from the Cisco Support Site, and you need to download the qcow2 image (for KVM/QEMU-based virtualization). In this case, I’ll use IOS-XE version 17.03.03 and upload the image to CML at Tools > Node and Image Definitions. On this page, you need to switch to the image definition tab and upload the qcow2-image file downloaded from CCO together with some base parameters for the virtualization layer. These are Memory, CPU, and CPU limit which are set on my instance to 8192, 4 and 100 respectively.
The definition file for the Catalyst 9800-CL is available together with additional third-party node definitions at the
CML Community Repository on GitHub. You just need to download the cat9800.yml file, import it to as a node definition and associate it to the image that we create a second ago.
According to the README on the CML Community repository for the Catalyst 9800, there is a known issue with the serial console on this node type. To connect to the console, you need to use the VGA console instead of the serial console for the Catalyst 9800.
Create a First Test Lab
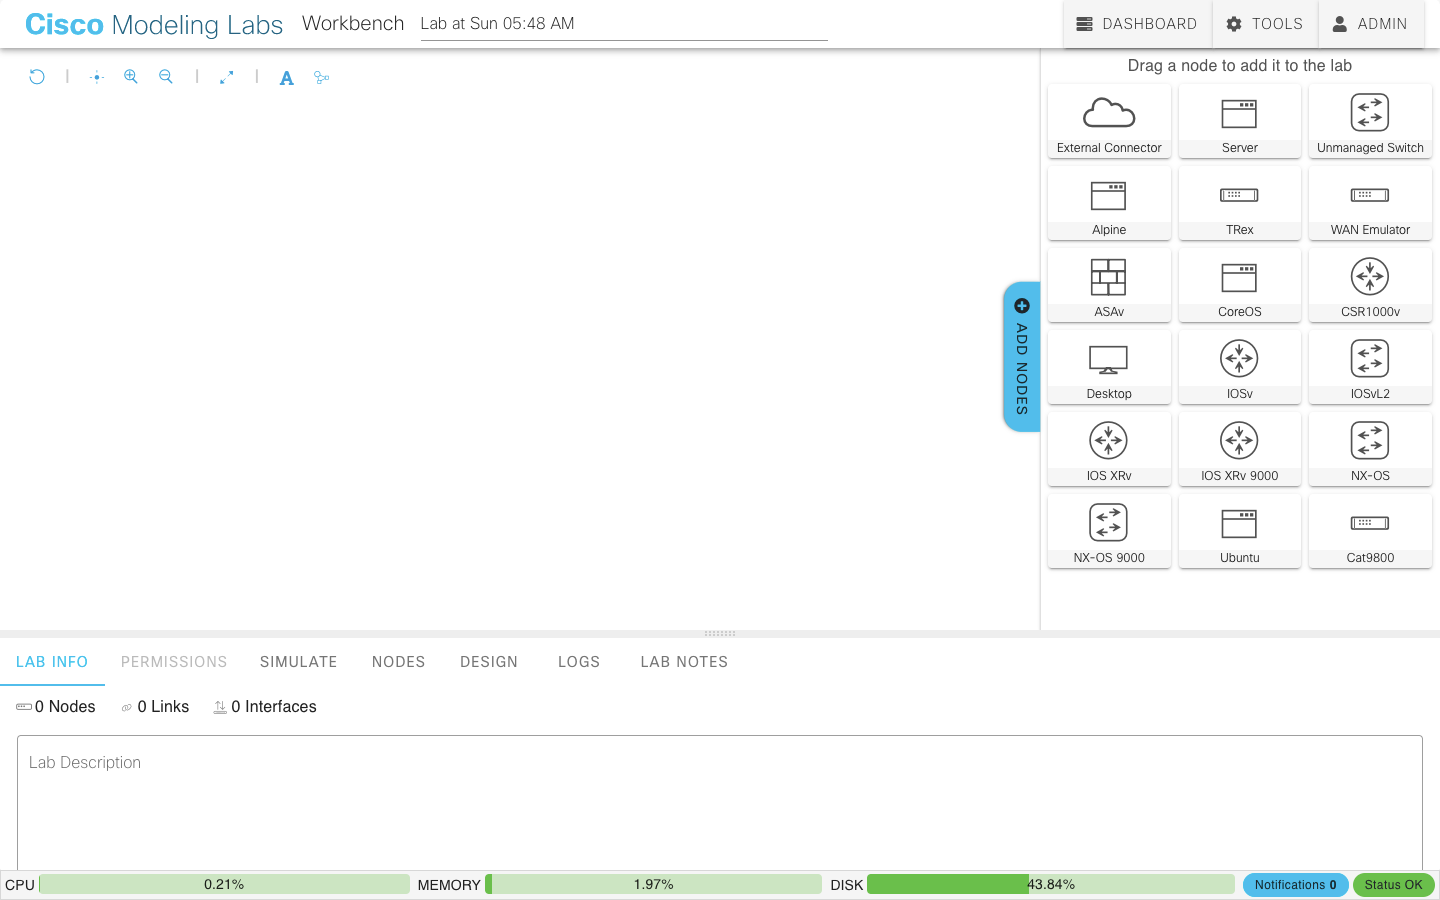
Now start with building a first lab hosted on CML personal. You can start with a sample lab that are available at Tools > Sample Labs or create a blank one from the dashboard. We’ll continue with an empty one by clicking on the ADD button in the top-right corner at the dashboard page. This opens the lab editor, which looks similar to the following screenshot.
On the right side, you find all available node types that can be dragged-and-dropped to the lab. There are a lot of predefined device images that are summarized in the following table:
| Node Name | Description | Version in 2.2 (with refplat 20210511) |
|---|---|---|
| External Connector | used to connect a lab to the external network via the CML network adapter | — |
| Unmanaged Switch | simple port-replicator for the infrastructure | — |
| ASAv | Cisco ASAv virtual firewall | 9.15.1 |
| CSR1000v | Cisco Cloud Services Router 1000v | IOS-XEv 17.03.02 |
| IOSv | Cisco IOS Router | IOSv 15.9(3)M3 |
| IOSvL2 | Cisco Catalyst Switch Simulator | IOX L2 2020 |
| IOS-XRv | Cisco IOS XRv Router | IOS-XRv 6.3.1 |
| IOS-XRv 9000 | Cisco IOS XRv 9000 Router -- doesn't boot on Ryzen CPUs according | IOS-XRv 7.2.2 |
| NX-OS | Cisco NX-OS | NX-OSv 7.3.0 |
| NX-OS 9000 | Cisco Nexus 9500v | NX-OSv 9.3.6 |
There are some additional nodes including Ubuntu Linux and a Desktop to get a Workstation in the lab. Furthermore, there is also a Traffic Generator (TRex), a WAN Emulator and of course the Catalyst 9800 node type available.
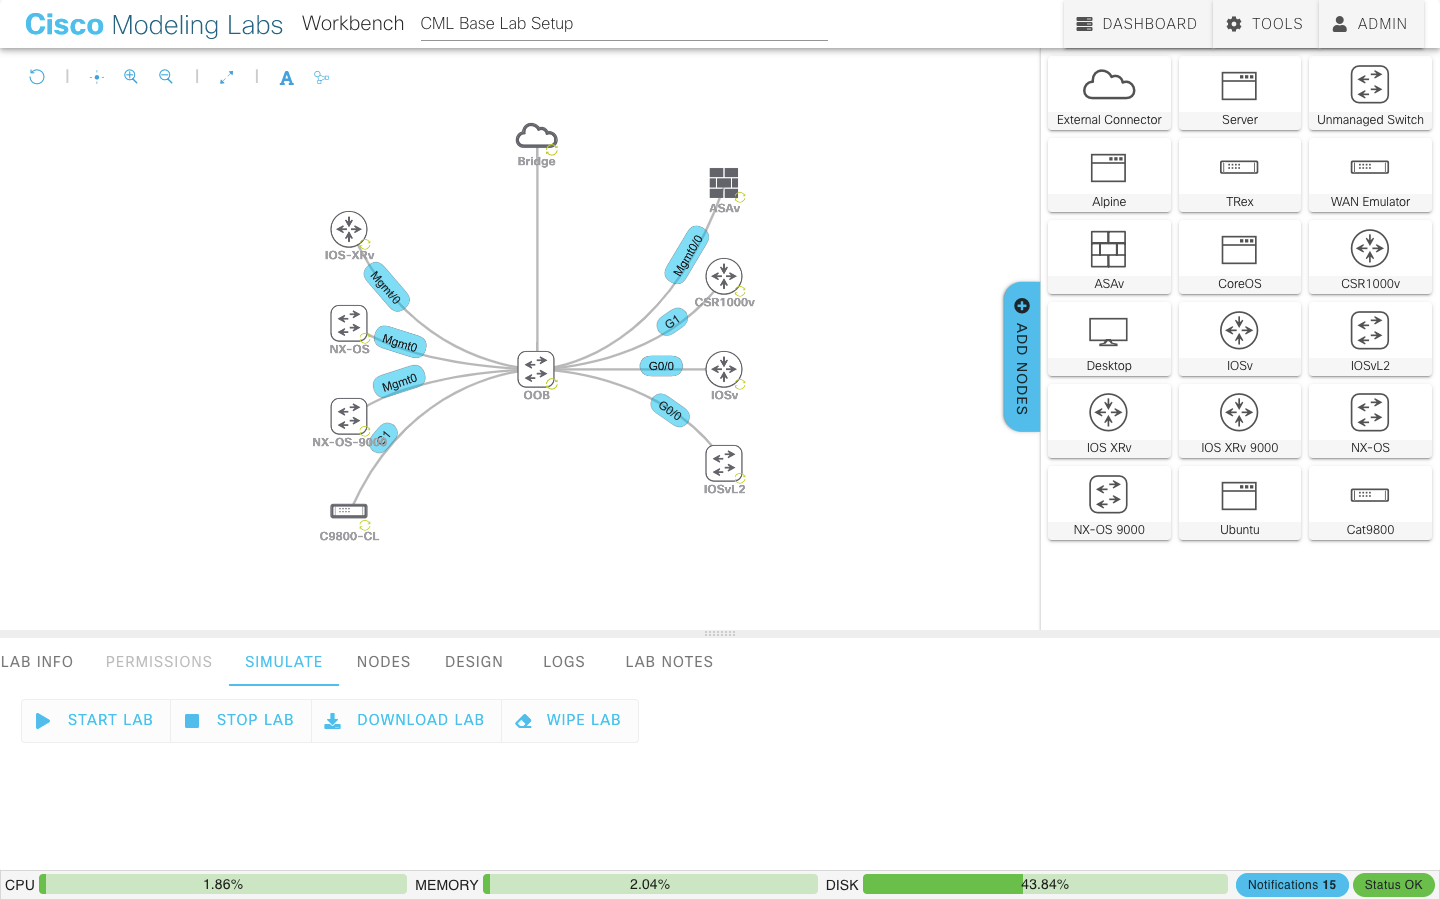
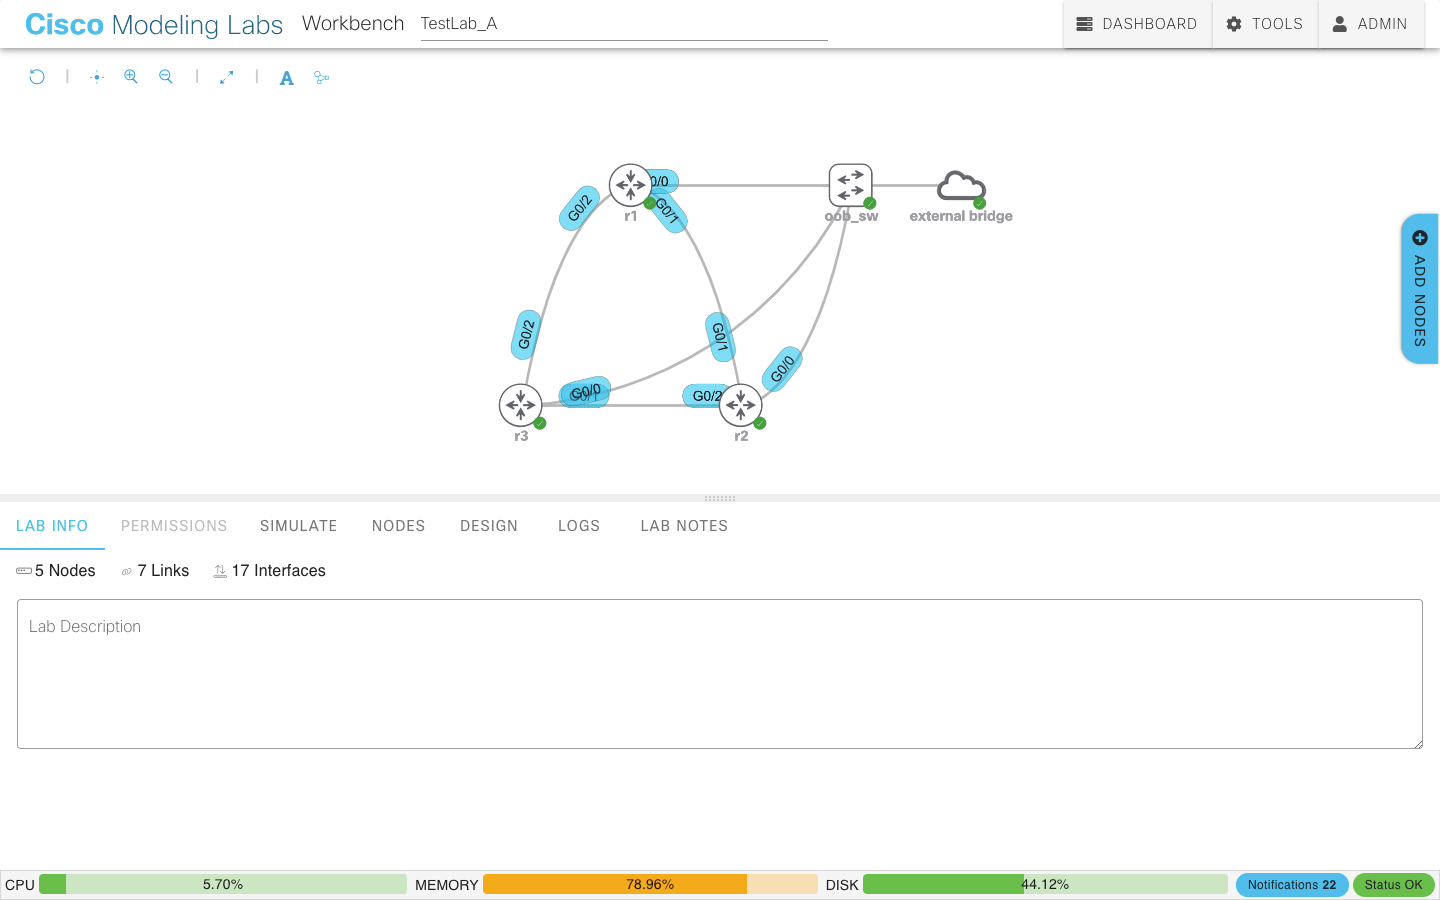
For testing, I add an “External Connector”, a “Unmanaged Switch” as OOB Switch and several nodes to the lab so that all virtual devices are reachable via my local network. The lab looks now like the following screenshot.
Now, we are ready to start the lab… I dedicated some resources to the VM, including 32 GB of RAM and 12 vCPUs, and it took around 10 minutes to boot the lab. You can verify the state of the lab at the nodes tab of CML and connect to the console while clicking on a node as shown in the following screenshot.
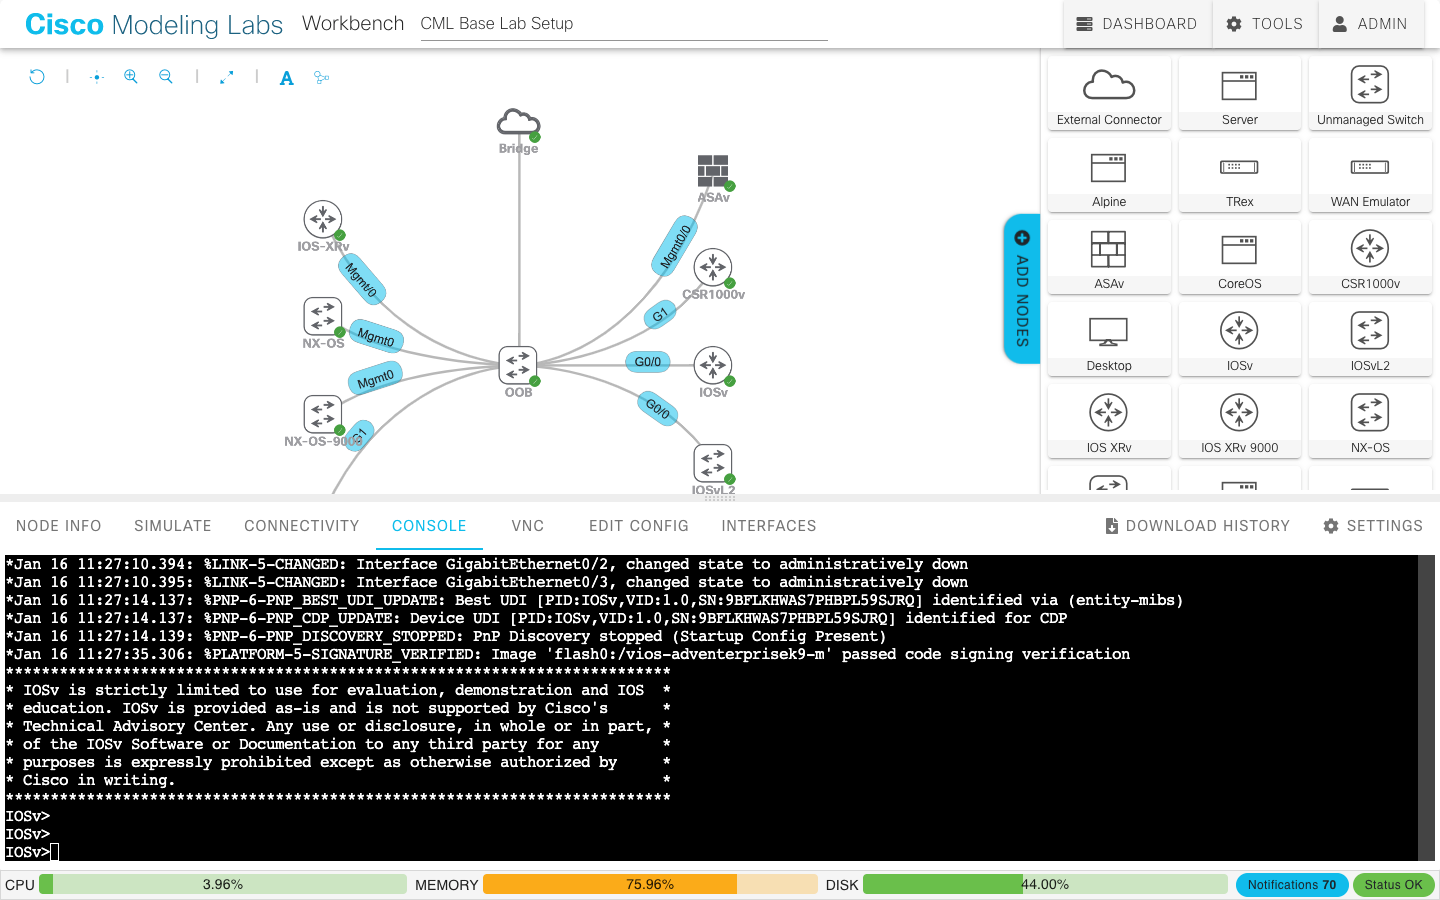
The connection to the devices is possible via console except for the Catalyst 9800-CL which is just reachable via VNC as mentioned above.
Connect to the Lab without External Bridge
A direct connection to the external network is not in every case helpful or possible. In such cases, CML personal provides a breakout tool that is shipped as part of the CML controller. It’s available at the /breakout-docs/ sub-URL on CML. With this tool, it’s possible to tunnel the serial connections through an encrypted TLS tunnel to the virtual lab and make the devices reachable if they are connected directly to the local computer.
There are several options to run the tool, and I’ll like to quickly show the UI version. After the installation as mentioned in the Breakout Tool Installation Guide, you just need to run the following command:
$ breakout ui
Starting up...
This will start a Web-UI that is reachable at http://localhost:8080. To use it, you need to connect the tool to your CML instance, as described at the Configure Breakout Tool Section. If the integration is successfully configured, you see all running labs in the breakout UI as shown in the following screenshot.
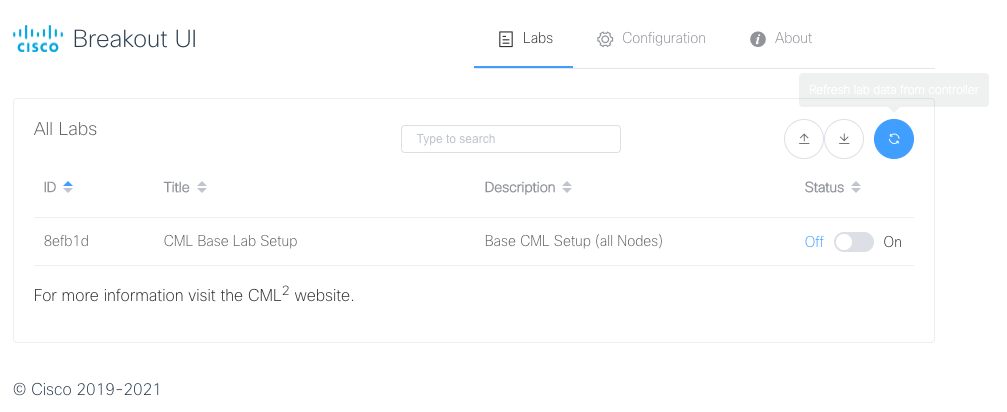
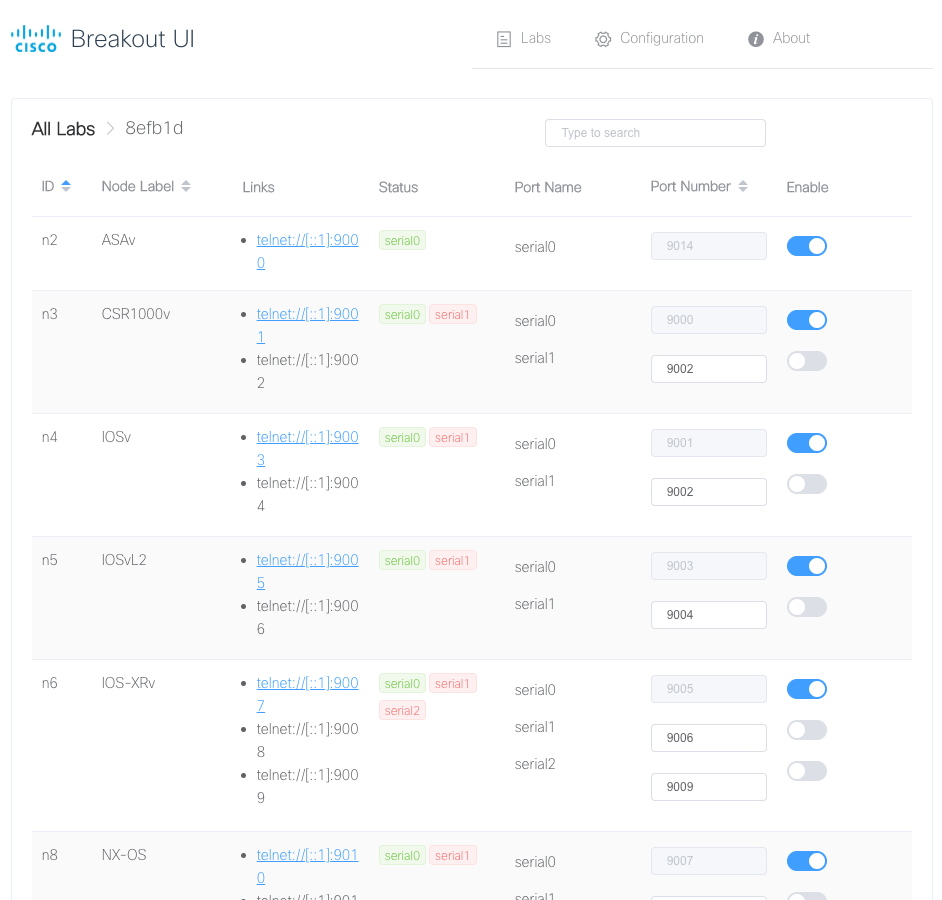
To make the devices reachable via localhost, just swap the status to “on”. The details regarding the port numbers are visible when you click on the lab. The following page shows all required connection data, as shown in the next screenshot.
Additional information about the breakout tool are available at the Breakout Tool section of the CML User Guide.
Create and Destroy Labs via API
The last point that I want to highlight is to automate the creation of labs using the API. Cisco provides a VIRL2 Python Client Package which are considered as beta (as of January 2022) and tested with Python 3.6.8.
I’ll create a small example script as GitHub Gist that creates a lab with three routers that are connected to an external network. The script is straightforward to understand, and I just want to show the results in the following screenshot.
This opens new possibilities to provide a temporary infrastructure with a defined state, e.g. to automate the test for a network automation solutions or libraries.
Final Thoughts
As summary, CML personal provides an easy way to get a virtualized lab up and running. Even if I ran into certain smaller issues, e.g. that nodes are sometimes not deletable, I found a solution or workaround for the most problems (except the AMD issue with the IOS-XRv 9000). Compared to EVE-NG, the setup was effortless, but there is of course a price tag associated to this comfort.
I’ll use it within the next months and will see how it works out. There are some additional topics which I didn’t test yet, e.g. the Ansible VIRL integration, but I’ll add a link to the further reading session if you want to dig deeper into this topic.
Resources and Further Reading
- CML Lab Setup Script Example (GitHub Gist)
- Cisco Modeling Labs Homepage
- EVE-NG
- CML System Requirements
- CML Installation Guide
- CML Community Repository on GitHub
- Learning Network: Xrv9000 does not boot on AMD Ryzen CPU?
- Breakout Tool Installation Guide
- Configuring the Breakout Tool
- Breakout Tool - CML User Guide
- VIRL2 Python Client Package
- Cisco Modeling Labs: Personal and Personal Plus Datasheet
- Ansible VIRL integration